Easter Chocolate Bark – A Fun and Easy Treat


Making Easter chocolate bark feels like a little throwback to childhood. Melting chocolate, tossing on colorful candies, and not worrying about making it look perfect. It’s one of those treats where the fun is just as important as the flavor.
The best part? It’s easy enough for kids to jump in, whether they’re placing mini eggs or sneaking a few along the way. No complicated steps, just a simple, hands-on way to bring a little Easter magic into the kitchen.

How to Make Easter Chocolate Bark
Here are the ingredients you need to make this Easter chocolate bark, plus step by step instructions for how to make it.
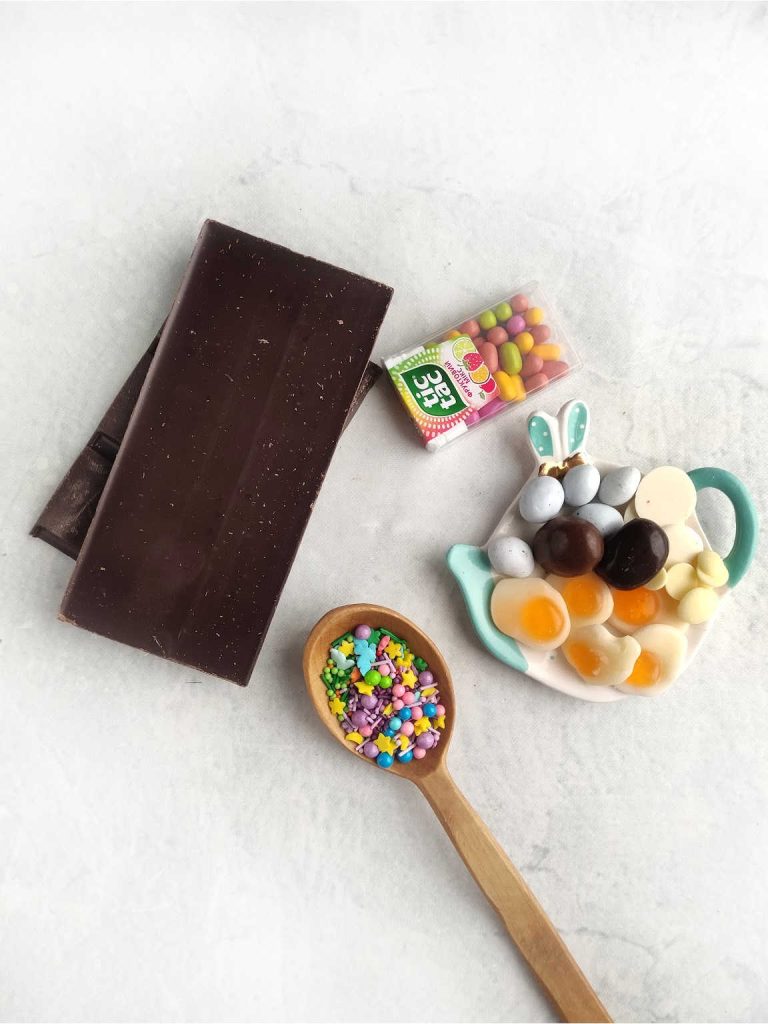
Ingredients
- 4-5 candy fried marmalade eggs
- 2 bars of dark chocolate
- 1 teaspoon of spring sprinkles
- 2-3 chocolate mini eggs
- 2-3 peanut candy white frosting (quail eggs)
- 5-6 drops of large white chocolate drops
- 5-6 white chocolate drops
Step by Step Instructions
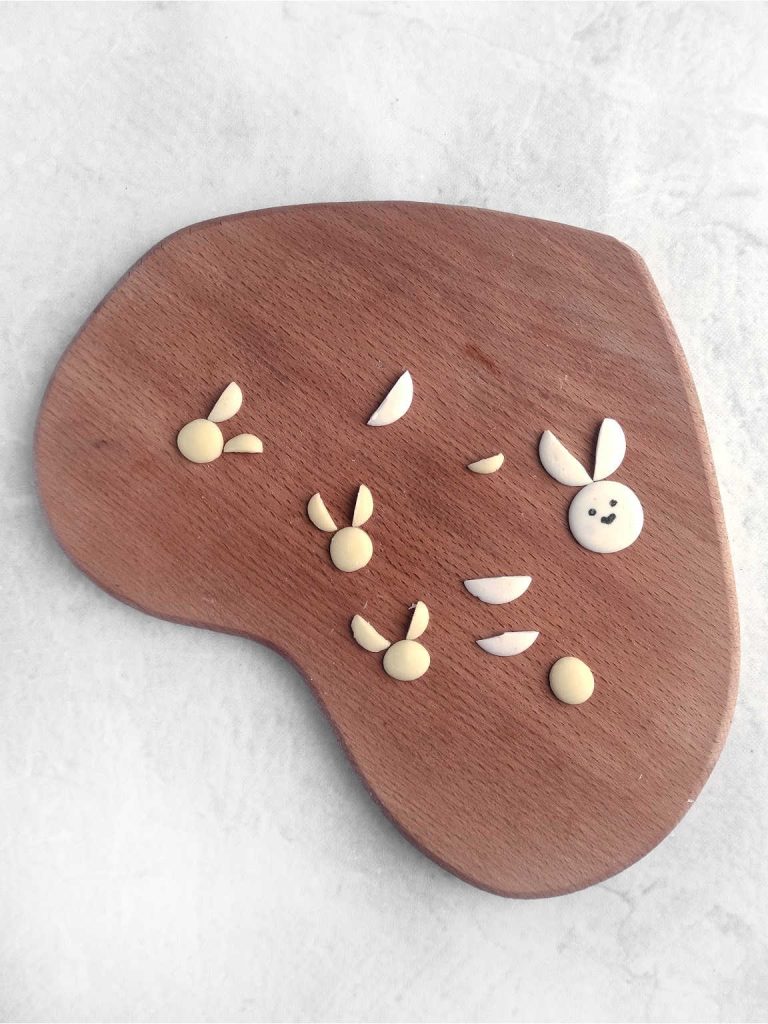
1. Before melting the chocolate, make the edible bunny decorations. Take a few large white chocolate drops and carefully cut them in half or into smaller sections (these will become the bunny ears). Use a food-safe marker to draw little bunny faces on whole chocolate drops, giving them a playful, festive look. Set these aside for later.
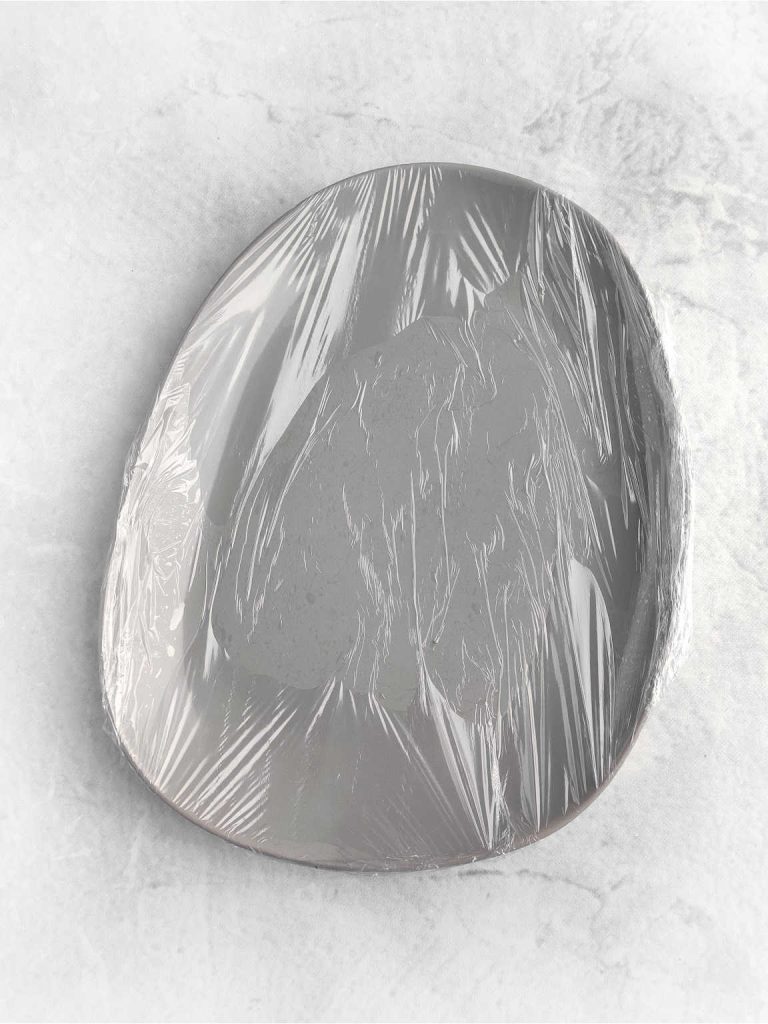
2. To shape the bark, you’ll need an oval plate with slightly raised edges or a special mold (We used an oval plate). If using a plate, cover it with plastic wrap to prevent sticking. Press the wrap down smoothly to create a flat surface. This will serve as the base for your chocolate bark.
3. Break the dark chocolate into small, even pieces and place them in a heatproof bowl. Set aside two pieces for tempering later. Melt the chocolate using a double boiler (placing the bowl over a pot of simmering water) and stir occasionally until fully melted and smooth. Remove from heat and immediately add the reserved chocolate pieces, stirring until they melt completely. This helps stabilize the chocolate, giving it a glossy finish and better texture.
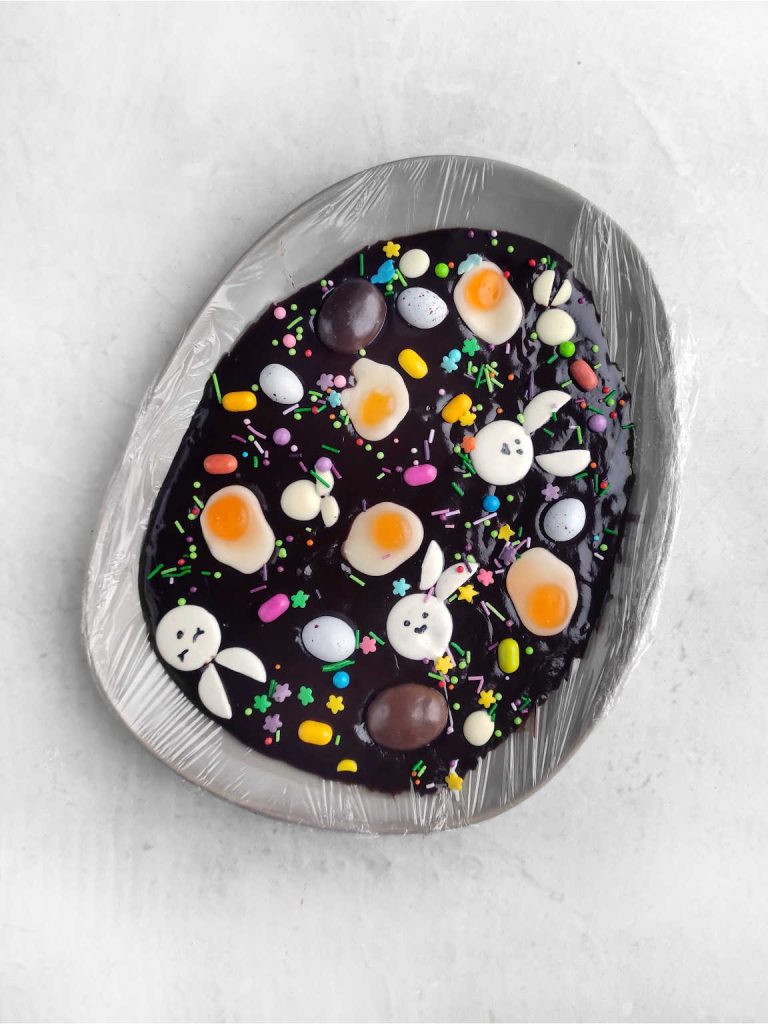
4. Pour the melted chocolate onto the prepared plate or mold, spreading it evenly into an oval shape. Let it sit for a couple of minutes before adding toppings. This prevents the candies from melting and losing their shape. Arrange the bunny decorations, candy fried marmalade eggs, chocolate mini eggs, and peanut candy quail eggs on top. Gently press them into the chocolate so they stick.
5. Sprinkle the chocolate with spring sprinkles to add a festive touch. Once everything is in place, transfer the plate to the fridge and let the bark set for about an hour.
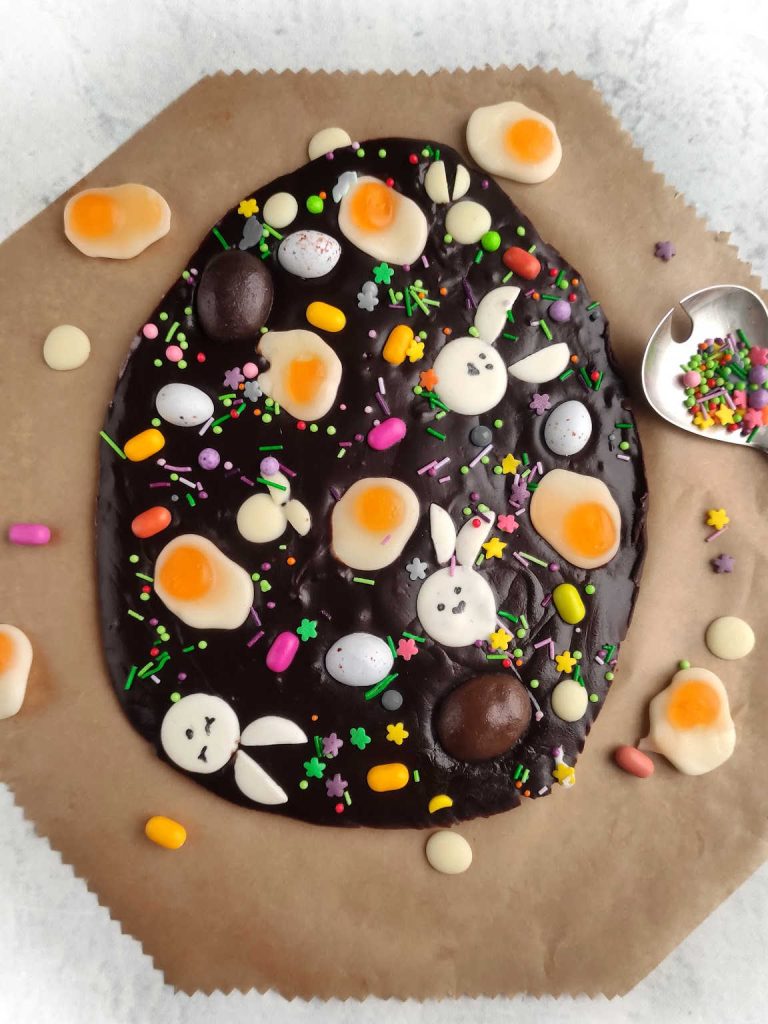
6. Once firm, carefully lift the chocolate bark from the plate and peel off the plastic wrap. You can serve it whole as a centerpiece treat or break it into smaller pieces for easy snacking. Store any leftovers in an airtight container at room temperature for up to 7 days.
Freezing Option
If you’d like to save some for later, wrap the bark in parchment paper and place it in a freezer-safe bag. It can be stored in the freezer for up to a month. Before serving, let it sit at room temperature for about
This Easter chocolate bark is an easy way to add a homemade touch to your Easter celebrations, whether you’re sharing with family or packaging some up as gifts. Plus, since it’s so simple to make, you can switch up the toppings and get creative with different flavors and textures. However you customize it, this Easter bark is a fun, hands-on treat that brings everyone together in the kitchen.
More Easter Treats

Easter Chocolate Bark
Ingredients
- 4-5 candy fried marmalade eggs
- 2 bars of dark chocolate
- 1 teaspoon of spring sprinkles
- 2-3 chocolate mini eggs
- 2-3 peanut candy white frosting quail eggs
- 5-6 drops of large white chocolate drops
- 5-6 white chocolate drops.
Instructions
- Before melting the chocolate, make the edible bunny decorations. Take a few large white chocolate drops and carefully cut them in half or into smaller sections (these will become the bunny ears). Use a food-safe marker to draw little bunny faces on whole chocolate drops, giving them a playful, festive look. Set these aside for later.
- To shape the bark, you’ll need an oval plate with slightly raised edges or a special mold (We used an oval plate). If using a plate, cover it with plastic wrap to prevent sticking. Press the wrap down smoothly to create a flat surface. This will serve as the base for your chocolate bark.
- Break the dark chocolate into small, even pieces and place them in a heatproof bowl. Set aside two pieces for tempering later. Melt the chocolate using a double boiler (placing the bowl over a pot of simmering water) and stir occasionally until fully melted and smooth. Remove from heat and immediately add the reserved chocolate pieces, stirring until they melt completely. This helps stabilize the chocolate, giving it a glossy finish and better texture.
- Pour the melted chocolate onto the prepared plate or mold, spreading it evenly into an oval shape. Let it sit for a couple of minutes before adding toppings. This prevents the candies from melting and losing their shape. Arrange the bunny decorations, candy fried marmalade eggs, chocolate mini eggs, and peanut candy quail eggs on top. Gently press them into the chocolate so they stick.
- Sprinkle the chocolate with spring sprinkles to add a festive touch. Once everything is in place, transfer the plate to the fridge and let the bark set for about an hour.
- Once firm, carefully lift the chocolate bark from the plate and peel off the plastic wrap. You can serve it whole as a centerpiece treat or break it into smaller pieces for easy snacking. Store any leftovers in an airtight container at room temperature for up to 7 days.